
The OmniLogic Manual Hardwired Network offers a reliable and efficient pool automation solution‚ designed for both residential and commercial use. This system ensures stable and fast communication between devices‚ providing seamless control over pool and spa equipment. The manual guides users through installation‚ configuration‚ and customization‚ making it easy to manage pumps‚ heaters‚ lights‚ and more. With its scalable design‚ the OmniLogic system adapts to various pool setups‚ ensuring optimal performance and convenience. The manual also covers troubleshooting and maintenance tips‚ helping users maintain their system’s efficiency and extend its lifespan.
1.1 Overview of the OmniLogic System
The OmniLogic system is a cutting-edge pool automation solution designed to streamline control over pool and spa equipment. It offers a modular‚ expandable design‚ allowing users to tailor the system to their specific needs. The system supports both hardwired and wireless configurations‚ ensuring flexibility and reliability. OmniLogic is known for its intuitive interface‚ which simplifies programming and operation. It enables users to manage pumps‚ heaters‚ lights‚ and other equipment seamlessly. The system also integrates with Hayward’s app‚ providing remote access and control. With features like scheduling‚ themes‚ and customizable settings‚ OmniLogic enhances convenience and efficiency; Its robust design ensures stable performance‚ making it a preferred choice for pool automation. The system is backed by comprehensive manuals and support‚ ensuring easy installation‚ configuration‚ and troubleshooting. OmniLogic is designed to deliver a superior pool ownership experience through innovative technology and user-friendly functionality.
1.2 Importance of a Hardwired Network in Pool Automation
A hardwired network is crucial for reliable and stable pool automation‚ offering superior performance compared to wireless systems. It ensures consistent communication between devices‚ eliminating interference and signal loss. This reliability is vital for controlling critical equipment like pumps‚ heaters‚ and valves‚ which require precise operation. A hardwired setup minimizes downtime and ensures seamless functionality‚ especially in larger or complex pool systems. Additionally‚ it provides enhanced security‚ reducing the risk of unauthorized access. The OmniLogic system leverages this stability to deliver efficient automation‚ allowing users to manage their pool and spa with confidence. By eliminating wireless signal dependency‚ a hardwired network guarantees uninterrupted control and optimal performance‚ making it a cornerstone of modern pool automation systems. This approach is particularly beneficial for users seeking long-term reliability and minimal maintenance.
1.3 Key Features of the OmniLogic Manual
The OmniLogic Manual offers a comprehensive guide to maximizing pool automation efficiency. Key features include an intuitive user interface‚ customizable themes‚ and programmable schedules for pool equipment. It supports expandable modular architecture‚ allowing users to adapt the system to their specific needs. The manual provides step-by-step instructions for installation‚ configuration‚ and troubleshooting. It also details firmware update processes and customization options‚ such as favorites and equipment settings. Additionally‚ the manual emphasizes the importance of a hardwired network for reliable communication. Advanced features like USB backup and upgrade options ensure system longevity. The manual is designed to empower users with clear‚ detailed instructions‚ enabling seamless control over pool and spa systems. Its thorough approach ensures optimal performance‚ making it an essential resource for OmniLogic users seeking to enhance their pool automation experience.

Installation and Setup of OmniLogic Hardwired Network
The installation and setup of the OmniLogic hardwired network are straightforward‚ requiring proper planning and configuration to ensure reliable connectivity for pool automation.

2.1 Pre-Installation Requirements
Before installing the OmniLogic hardwired network‚ ensure all necessary components are available‚ including relays‚ sensors‚ and wiring materials. Verify compatibility with existing pool equipment and ensure the system is powered off during installation. Familiarize yourself with the installation manual and safety guidelines to avoid electrical hazards. Proper grounding and voltage checks are essential to prevent damage. Ensure the network layout is planned to minimize interference and optimize performance. Additionally‚ confirm that the latest firmware is installed and that all devices are compatible with the OmniLogic system. Following these steps ensures a smooth and safe installation process.
2.2 Step-by-Step Installation Guide
Begin by powering off all pool equipment and ensuring the system is safe to work with. Mount the OmniLogic control unit in an accessible location‚ adhering to the manufacturer’s guidelines. Connect the low-voltage communication wiring to the control unit and peripheral devices‚ ensuring secure and labeled connections for easy identification. Assign relays to each piece of equipment‚ such as pumps and heaters‚ following the wiring diagram provided in the manual. Install temperature sensors in appropriate locations to monitor water conditions accurately. Once all components are connected‚ power on the system and perform a basic functionality test to ensure proper operation. Finally‚ configure the network settings and pair all devices through the control interface or the Hayward app‚ completing the installation process with a final system check to ensure everything operates smoothly.
2.3 Initial Configuration and Setup
After installation‚ power on the OmniLogic system and access the control interface via the touchscreen or connected device. Navigate to the setup menu to configure network settings‚ ensuring proper IP address assignment for seamless communication. Pair all sensors and equipment with the control unit‚ syncing each device according to the manual’s instructions. Input equipment-specific details‚ such as pump types and heater models‚ to enable precise control. Set up user preferences‚ including themes and favorites‚ to customize system operation. Finally‚ perform a system test to verify all components are functioning correctly and communication is stable. Proper configuration ensures optimal performance and ease of use‚ allowing you to manage your pool and spa efficiently. Refer to the manual for detailed guidance on each configuration step to avoid errors and ensure compatibility.
Network Configuration and Wiring
The OmniLogic system requires precise network configuration and wiring to ensure reliable communication between devices. Assign IP addresses‚ configure relays‚ and establish low-voltage connections for optimal performance. Consult the manual for detailed wiring diagrams and setup instructions to avoid errors and ensure compatibility with all equipment.

3.1 Understanding Network Parameters
Understanding network parameters is essential for configuring the OmniLogic system. These parameters define how devices communicate‚ ensuring reliable data transmission and system functionality. Key parameters include IP addresses‚ subnet masks‚ and gateway settings‚ which must be correctly assigned to avoid conflicts. The OmniLogic supports both static and dynamic IP addressing‚ depending on network requirements. Proper configuration of these settings ensures seamless communication between controllers‚ sensors‚ and connected equipment. Additionally‚ understanding low-voltage wiring parameters is crucial for maintaining signal integrity and preventing interference. Refer to the manual for detailed guidance on assigning IP addresses and configuring network settings to optimize performance. Correct parameter setup ensures efficient operation‚ while errors can lead to connectivity issues or system malfunctions. Always consult the manual for specific instructions tailored to your setup.
3.2 Assigning Relays and Equipment
Assigning relays and equipment is a critical step in configuring the OmniLogic system. Each relay corresponds to specific pool equipment‚ such as pumps‚ heaters‚ or lights‚ and must be correctly assigned for proper functionality. The manual provides detailed instructions for mapping relays to equipment‚ ensuring seamless control. Users can customize assignments based on their pool setup‚ allowing for precise automation. Proper assignment prevents conflicts and ensures that commands are executed accurately. Additionally‚ low-voltage communication wiring must be correctly connected to relays and equipment to maintain signal integrity. Always use genuine Hayward parts to ensure compatibility and performance. Refer to the manual for step-by-step guidance on assigning relays and equipment‚ ensuring your system operates efficiently and reliably. Correct assignments are vital for maximizing the system’s potential and minimizing operational issues.
3.3 Configuring Valve Outputs and Temperature Sensors
Configuring valve outputs and temperature sensors ensures precise control over pool and spa operations. The OmniLogic system allows users to customize valve outputs to regulate water flow and temperature settings. Temperature sensors provide real-time data‚ enabling automated adjustments for optimal comfort and efficiency. Proper configuration involves setting thresholds‚ assigning sensors to specific equipment‚ and ensuring accurate calibration. The manual guides users through the process‚ emphasizing the importance of correct wiring and assignment. Valve outputs must be calibrated to match the pool’s hydraulic system‚ while temperature sensors should be placed strategically for accurate readings. Regular maintenance‚ such as cleaning sensors and checking valve alignment‚ is crucial for sustained performance. By following the manual’s instructions‚ users can achieve precise control over their pool environment‚ enhancing overall automation and system reliability. Proper configuration is essential for maintaining optimal pool conditions and extending equipment lifespan.
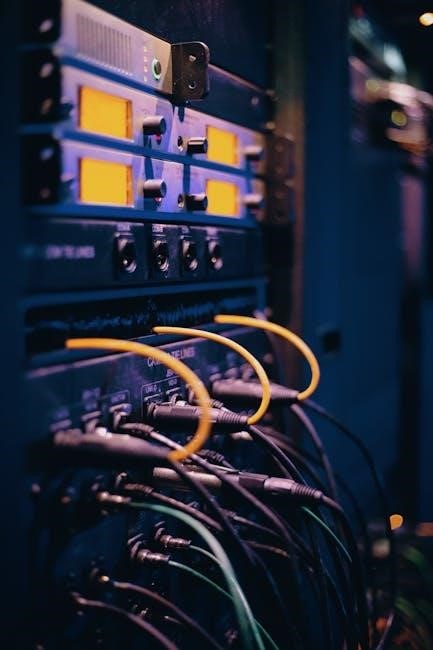
3.4 Low Voltage Communication Wiring
Low voltage communication wiring is critical for ensuring reliable data transmission between OmniLogic system components. Use Hayward genuine low-voltage communication cables to maintain signal integrity and avoid interference. Proper shielding and routing are essential to prevent electromagnetic interference. Follow the manual’s guidelines for cable lengths and connections to ensure optimal performance. Terminate connections securely to avoid signal degradation or loss. Regularly inspect wiring for damage or wear‚ addressing issues promptly to prevent system malfunctions. Grounding should be done correctly to ensure safety and proper operation. Always refer to the OmniLogic Installation Manual for specific wiring diagrams and instructions tailored to your setup. Proper wiring ensures seamless communication‚ enabling precise control over pool equipment and maintaining the system’s efficiency and reliability. Adhere to these best practices to guarantee long-term performance and trouble-free operation of your OmniLogic network.

Firmware and Software Management
Firmware updates are crucial for optimal performance and security. The manual provides detailed steps for upgrading firmware‚ troubleshooting issues‚ and ensuring the system runs the latest version.
4.1 Importance of Firmware Updates
Firmware updates are essential for maintaining the optimal performance and security of the OmniLogic system. They provide bug fixes‚ enhance functionality‚ and ensure compatibility with new devices. Regular updates prevent system vulnerabilities and improve overall reliability. Neglecting updates can lead to compatibility issues‚ reduced performance‚ or exposure to security risks. The manual emphasizes the necessity of using the latest firmware version‚ as outdated software may fail to support advanced features or integrate with newer hardware. By keeping the firmware updated‚ users ensure their OmniLogic system operates efficiently‚ securely‚ and as intended. Always refer to the official Hayward website or provided documentation for the most recent updates and installation instructions;
4.2 Upgrading Firmware
Upgrading the firmware on your OmniLogic system is a crucial process that ensures your pool automation operates with the latest features and security patches. To begin‚ download the most recent firmware version from Hayward’s official website. This ensures compatibility and optimal performance. Next‚ transfer the downloaded firmware file to a USB drive‚ formatting it as specified in the manual to guarantee recognition by the OmniLogic system. Insert the USB drive into the designated port on the control panel. Navigate to the system’s menu‚ typically under settings or service mode‚ and select the firmware update option. Once initiated‚ allow the update to run uninterrupted to prevent potential system corruption. After completion‚ restart the system to apply the new firmware. It’s important to follow these steps carefully to maintain your system’s integrity and functionality. Always refer to the manual for detailed instructions specific to your OmniLogic model.
4.3 Troubleshooting Firmware Issues
Troubleshooting firmware issues on the OmniLogic system is essential to maintain optimal performance. If the system fails to respond or exhibits incorrect functionality‚ restart the OmniLogic control panel to resolve temporary glitches. Check the firmware version to ensure it is up-to-date‚ as outdated versions may cause malfunctions. If issues persist‚ perform a factory reset by navigating to the system menu and selecting the reset option. Note that this will erase custom settings‚ so back up configurations beforehand. For unresolved problems‚ contact Hayward support for assistance‚ as they may require reinstallation of the firmware. Always use genuine Hayward components to avoid compatibility issues. Regularly updating and maintaining the firmware ensures your pool automation system operates smoothly and efficiently.

Programming and Customization
The OmniLogic system allows users to create custom themes‚ schedules‚ and equipment settings‚ ensuring personalized control over pool and spa automation. Themes can be tailored with specific names and icons‚ while scheduling enables automatic operation of pumps‚ heaters‚ and lights. Customizing equipment settings provides precise control‚ enhancing efficiency and user experience. This feature-rich system adapts to individual preferences‚ offering a seamless and intuitive automation solution for pool maintenance and enjoyment.
5.1 Creating Themes and Favorites
Creating themes and favorites in the OmniLogic system allows users to personalize their pool and spa automation experience. Themes enable grouping of frequently used equipment settings‚ making it easy to adjust multiple devices with a single command. Users can assign custom names and icons to themes‚ enhancing organization and accessibility. Favorites provide quick access to commonly used settings‚ streamlining operation. The system supports up to 25 themes‚ offering flexibility for various scenarios. By customizing themes and favorites‚ users can tailor their automation system to specific needs‚ simplifying control and enhancing overall convenience. This feature ensures a seamless and intuitive user experience‚ making pool maintenance and enjoyment more efficient and enjoyable.
5.2 Scheduling Pool Equipment
Scheduling pool equipment with the OmniLogic system enhances automation and energy efficiency. Users can program specific times for pumps‚ heaters‚ and other devices to operate‚ ensuring optimal performance while reducing energy consumption. The system allows for flexible scheduling‚ enabling customization to suit daily routines or seasonal needs. Advanced features like SuperChlorinate can be integrated into schedules for enhanced water treatment. Schedules can be easily modified or overridden manually‚ providing convenience and control. This feature ensures that pool equipment operates efficiently‚ maintaining ideal conditions without constant manual intervention. By automating tasks‚ users save time and reduce operational costs‚ making pool ownership more manageable and enjoyable; The scheduling function is a key aspect of the OmniLogic system‚ designed to streamline pool maintenance and improve overall system performance.

5.3 Customizing Equipment Settings
Customizing equipment settings in the OmniLogic system allows users to tailor their pool automation experience to specific needs. The manual provides detailed guidance on adjusting parameters for pumps‚ heaters‚ lights‚ and other devices. Users can set temperature thresholds‚ valve outputs‚ and timer sequences to optimize performance. The system also supports custom themes and favorites‚ enabling quick access to frequently used configurations. Advanced settings‚ such as SuperChlorinate‚ can be programmed to maintain ideal water conditions. This level of customization ensures that the OmniLogic system adapts seamlessly to individual preferences and pool requirements. By personalizing equipment settings‚ users can enhance efficiency‚ reduce energy consumption‚ and enjoy a more convenient pool ownership experience. The OmniLogic system’s flexibility makes it a versatile solution for various pool setups and user lifestyles.
Troubleshooting and Maintenance
Regular maintenance and troubleshooting ensure optimal performance of the OmniLogic system. Users can resolve common issues like faulty fuses or wiring problems by referencing the manual. Routine checks and updates help maintain functionality and prevent downtime‚ ensuring a smooth pool automation experience.
6.1 Common Issues and Solutions
Common issues with the OmniLogic system include faulty fuses‚ transformer malfunctions‚ and low voltage communication wiring problems. These can cause equipment to malfunction or lose connectivity. Users may also encounter issues with valve actuators not responding due to power supply failures. Additionally‚ outdated firmware can lead to system instability or feature incompatibility. To resolve these‚ users should first check the power supply and wiring connections‚ ensuring all components are securely linked. Upgrading the firmware to the latest version often addresses software-related problems. Referencing the troubleshooting section of the manual provides step-by-step solutions for identifying and repairing faulty components. Regular maintenance‚ such as inspecting fuses and updating firmware‚ helps prevent recurring issues. Consulting the manual or contacting Hayward support is recommended for persistent problems. Always use genuine Hayward parts for repairs to ensure compatibility and performance.
6.2 Routine Maintenance Tips
Regular maintenance is crucial to ensure the OmniLogic system operates efficiently and lasts longer. Start by inspecting all wiring connections to prevent corrosion or damage. Schedule periodic firmware updates to keep the system optimized. Clean the control panel and surrounding areas to avoid dust buildup. Test temperature sensors and relays to ensure accurate readings and smooth operation. Check the power supply for stability and avoid voltage fluctuations. Review the user manual for specific maintenance recommendations tailored to your setup. Additionally‚ inspect low voltage communication wires for any signs of wear. Perform routine checks on valve actuators and pool equipment to ensure proper functionality. By following these tips‚ you can prevent potential issues and maintain the system’s reliability and performance over time. Regular maintenance also helps in identifying and addressing minor problems before they escalate.
6.3 Resetting the OmniLogic System
Resetting the OmniLogic system can resolve various operational issues. Start by powering off the system and waiting 30 seconds before turning it back on. This soft reset often resolves temporary glitches. For a factory reset‚ locate the small reset button on the control panel‚ press and hold it for 10 seconds‚ then release. The system will revert to default settings‚ requiring reconfiguration of all customizations. Ensure firmware is updated after a factory reset to maintain optimal functionality. Regular resets can prevent software corruption and ensure smooth operation. Always refer to the manual for specific reset procedures tailored to your system configuration. Resetting should be done cautiously‚ as it erases custom settings and schedules‚ requiring reprogramming afterward. This step is ideal for troubleshooting persistent issues or preparing the system for a new setup.