
Common Jenn Air Oven Problems
Common Jenn Air oven issues include temperature inaccuracies, faulty ignition, and error codes. Problems like a cracked igniter or defective control board often cause heating failures. Regular maintenance is essential to prevent such issues.
1.1. Oven Not Reaching the Correct Temperature
A common issue with Jenn Air ovens is their inability to reach the set temperature. This problem can stem from a defective electronic control board, which regulates heating elements, or a cracked igniter that disrupts gas flow. Additionally, a malfunctioning temperature sensor may misreport oven heat, preventing it from reaching the desired level. Users should first ensure proper preheating and check for error codes. If the issue persists, inspecting the igniter, bake element, and sensor for damage is recommended. In some cases, resetting the oven by turning off power for 30 minutes may resolve the problem. Professional repair may be necessary if internal components are faulty.
1.2. Door Not Sealing Properly
A malfunctioning oven door seal is a frequent issue in Jenn Air ovens. This problem often arises due to damaged or worn-out door seals, which prevent proper heat retention. Misaligned hinges or a warped door frame can also cause improper sealing. Users should inspect the door gasket for signs of wear or damage and ensure it is clean, as food residue can compromise the seal. If the gasket is damaged, replacing it is necessary. Additionally, checking the door lock mechanism for proper function is crucial, as a malfunctioning lock can prevent the door from closing tightly. Regular maintenance and inspections can help prevent this issue.
1.3. Self-Clean Cycle Not Working
If the self-clean cycle on your Jenn Air oven isn’t functioning, it could be due to an error code or a malfunction in the control panel. Common causes include a faulty temperature sensor or a defective electronic control board. Additionally, a blown fuse or tripped circuit breaker might prevent the cycle from starting. To resolve this, check for any error codes displayed on the oven’s screen and refer to the user manual for guidance. Resetting the oven by turning off power for 10 minutes may also help. Ensure the oven door is properly sealed and the self-clean latch is engaged. If issues persist, professional assistance may be required.
Troubleshooting the Oven’s Heating Issues
Identify heating problems by checking the igniter, bake element, and control board. A cracked igniter or faulty element can prevent proper heating. Resetting power may resolve issues.
2.1. Defective Electronic Control Board
A defective electronic control board is a common cause of heating issues in Jenn Air ovens. This board regulates power to the bake, broil, and fan circuits. Symptoms include the oven not heating or inconsistent temperatures. Check for error codes displayed on the control panel, as they may indicate a control board malfunction. Resetting the oven by turning off power for 10 minutes can sometimes resolve the issue. If the problem persists, the control board may need replacement. Always ensure proper installation and consult a professional if unsure, as improper handling can lead to further damage or safety risks.
2.2. Cracked Igniter
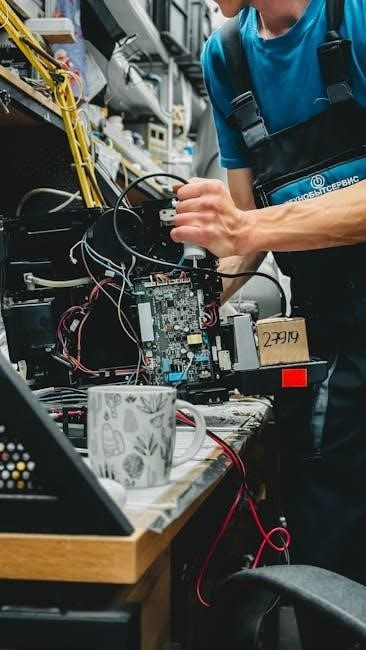
A cracked igniter is a common issue in Jenn Air ovens, leading to heating problems. The igniter is responsible for lighting the gas burner; If cracked, it may not glow or light the burner properly. Symptoms include the oven not heating or intermittent ignition. To diagnose, inspect the igniter for visible cracks or damage. If faulty, replace it with a compatible part. Ensure the oven is cool and power is off before attempting replacement. Consult a professional if unsure, as improper installation can cause safety hazards or further damage. Regular inspections can help prevent such issues and ensure reliable oven performance.
2.3. Broken Bake Element
A broken bake element is a common issue in Jenn Air ovens, leading to uneven or no heating during baking. The bake element is responsible for producing heat when the oven is in bake mode. If it’s damaged, the oven may not heat properly or display error codes. Signs of a broken bake element include visible cracks, glowing red spots, or no heat at all. To diagnose, turn off the oven, allow it to cool, and inspect the element for damage. If broken, replace it with a compatible part. Ensure the oven is unplugged before starting repairs. Use an ohmmeter to test for continuity if unsure. Always consult a professional if replacement seems complex.

Understanding Error Codes
Jenn Air ovens display error codes to indicate specific issues. Common codes relate to miswired electrical outlets, temperature display malfunctions, and stuck keys on the touchpad. Understanding these codes helps users identify and resolve problems quickly. Always refer to the user manual for code meanings and troubleshooting steps. If unsure, resetting the oven by turning off power for 10 minutes may resolve minor issues.
3.1. Miswired Electrical Outlets
Miswired electrical outlets are a common issue that can cause error codes on Jenn Air ovens. If the outlet is not properly wired, it may lead to power supply inconsistencies, affecting oven performance. Symptoms include error codes related to electrical issues, oven malfunction, or failure to heat. To diagnose, check the outlet’s wiring for correctness. Ensure the circuit breaker hasn’t tripped or a fuse blown; If unsure, consult a licensed electrician to verify the wiring. Correcting the outlet wiring typically resolves the issue. Regular inspections of electrical connections can prevent such problems. Always follow safety guidelines when working with electrical systems.
3.2. Temperature Display Issues
Temperature display issues on Jenn Air ovens can occur due to faulty sensors or control board malfunctions. Symptoms include incorrect temperature readings, fluctuating displays, or a complete loss of temperature indication. This can disrupt cooking accuracy and safety. To troubleshoot, restart the oven by disconnecting power for 10 minutes. If the issue persists, inspect the temperature sensor for damage or misalignment. A defective sensor or control board may need replacement. Ensure all internal connections are secure. If unresolved, contact a certified technician to diagnose and repair the problem. Proper calibration and sensor maintenance can help prevent such issues in the future.
3.3. Stuck Key on the Touchpad
A stuck key on the Jenn Air oven touchpad can prevent proper operation. This issue often occurs when keys are pressed repeatedly or with excessive force. To resolve, power off the oven and press every key to ensure they release. If the problem persists, unplug the oven for 5 minutes to reset the control system. Clean the touchpad with a soft cloth to remove grease or food residue. If the key remains unresponsive, the touchpad may need replacement. Regular cleaning and gentle use can help prevent this issue. Contact a professional if the problem recurs after troubleshooting.
Oven Door and Sealing Issues
Common issues include the door not closing properly, damaged door seals, and malfunctioning locks. These problems can lead to heat loss and inefficient cooking. Regular inspections and maintenance are crucial to ensure a tight seal and proper door alignment, preventing energy waste and ensuring safe operation.
4.1. Door Not Closing Properly
If the oven door is not closing properly, it can lead to inefficient cooking and potential safety hazards. Common causes include misaligned hinges, worn-out door seals, or obstructions blocking the door. Ensure the door is free from food debris and that the hinges are properly adjusted. Check for any warped or bent parts that may prevent the door from closing snugly. If the issue persists, inspect the latch or locking mechanism for damage. Regular cleaning and maintenance can help prevent such problems. Addressing this issue promptly is essential to maintain even heating and prevent energy loss during cooking cycles.
- Clean the door and hinges regularly.
- Inspect for obstructions or warped parts.
- Adjust or replace hinges if necessary.
4;2. Damaged Door Seals
Damaged door seals can lead to heat escaping, reducing the oven’s efficiency and potentially causing uneven cooking. Over time, door seals may wear out due to frequent use, food residue, or improper cleaning. If the seals are cracked, frayed, or loose, they may not create a proper seal when the door closes. This can result in higher energy bills and longer cooking times. Inspect the seals regularly and replace them if damaged. Properly fitting seals ensure safe and efficient cooking. Clean the area around the seals to prevent debris buildup, which can exacerbate wear. Addressing this issue promptly helps maintain optimal oven performance.
- Check for cracks or frayed edges in the seals.
- Ensure the door closes evenly without obstructions.
- Replace damaged seals to restore proper functionality.
4.3. Door Lock Malfunction
A malfunctioning door lock can prevent the oven door from closing or opening properly, disrupting cooking operations. This issue may occur due to mechanical failure, food residue, or electrical glitches. If the lock doesn’t engage, the oven may not function correctly, especially during self-cleaning cycles. Regular cleaning and inspection are crucial to avoid such problems. Additionally, ensuring the lock mechanism is free from debris can help maintain smooth operation. If the issue persists, consulting a professional technician is recommended to avoid further complications and ensure safety.
- Inspect the lock for food particles or debris.
- Check if the lock engages smoothly and quietly.
- Refer to the user manual for troubleshooting steps.
Ignition and Gas-Related Problems
Common issues include the igniter not glowing, gas burners failing to light, and gas odors during operation. These problems often stem from faulty igniters or gas line blockages. Immediate inspection and cleaning of gas ports and igniter surfaces can resolve many issues. However, persistent problems may require professional intervention to ensure safety and proper function.
5.1. Igniter Not Glowing
If the igniter in your Jenn Air oven is not glowing, it may indicate a faulty or cracked igniter. This issue can prevent the gas burner from lighting properly, leading to heating problems. Dirt or food residue on the igniter surface might also block its function. To resolve this, ensure the oven is turned off and cool, then clean the igniter gently with a soft brush or cloth. If the igniter is cracked or damaged, it will need to be replaced. Always disconnect power before performing any repairs. A malfunctioning igniter is a common cause of gas-related issues, so addressing it promptly is essential for safe operation.
5.2. Gas Burner Not Lighting
If the gas burner in your Jenn Air oven fails to light, it could be due to a faulty igniter, clogged burner ports, or issues with the gas supply line. Ensure the oven is preheated properly and check for any blockages in the burner ports. A cracked igniter may not produce the necessary spark to light the burner. Additionally, verify that the gas supply valve is fully open and there are no leaks in the connections. Cleaning the burner ports with a small brush can help resolve clogging issues; If the problem persists, it may indicate a defective igniter or gas valve, requiring professional inspection and replacement for safe operation.
5.3. Gas Odor During Operation
A gas odor during oven operation can indicate a safety issue. Common causes include gas leaks from faulty connections or a malfunctioning gas valve. Ensure all connections are secure and inspect for any signs of wear or damage. A faulty igniter might cause unburned gas to accumulate, leading to a strong smell. If the odor persists after checking connections, it may signal a defective gas valve or a clogged vent system. Always turn off the oven and gas supply immediately if you detect a strong gas smell. Contact a certified technician to diagnose and repair the issue to prevent potential safety hazards.
Control Panel and Touchpad Issues
Control panel and touchpad issues often involve non-responsive buttons or stuck keys. Power cycling the oven can resolve temporary malfunctions. If problems persist, professional repair may be needed.
6.1. Control Panel Not Responding
If the control panel on your Jenn Air oven is unresponsive, it may be due to a stuck key or a software glitch. Power cycling the oven by turning it off at the circuit breaker for 10 minutes can often reset the system. Additionally, ensure the oven is not in demo mode or locked, as this can disable functionality. If the issue persists, inspect the touchpad for food or moisture residue, which may interfere with its operation. In some cases, a faulty electronic control board or wiring may be the cause, requiring professional diagnosis and repair. Regular cleaning and maintenance can help prevent such issues.
6.2. Touchpad Malfunction
A malfunctioning touchpad can prevent you from controlling your Jenn Air oven. Stuck keys or power supply issues may cause this problem. Try turning the oven off for 5 minutes, then press every key to release any stuck ones before restoring power. Clean the touchpad with a soft cloth to remove food or moisture residue. If the issue persists, ensure the oven is not in demo mode or locked. Updating the oven’s software or replacing the touchpad may be necessary. If these steps fail, contact a certified technician to diagnose and repair the issue. Regular cleaning and avoiding harsh chemicals can help prevent touchpad malfunctions.
6.3. Demo Mode or Lockout Features
Demo mode or lockout features on your Jenn Air oven can disable normal operation. Demo mode is often activated during store displays, limiting functionality. To exit, refer to your user manual for specific instructions, as methods vary by model. Lockout features may engage due to safety protocols or accidental activation. Check if the control panel is locked by looking for a locked icon. Resetting the oven by turning it off for 30 minutes can sometimes deactivate these features. If the issue persists, consult the troubleshooting guide or contact a certified technician to ensure proper resolution and restore full functionality to your oven.
Bake and Broil Element Problems
Common issues include the bake element not heating, broil element malfunction, or uneven cooking. These problems often stem from a defective electronic control board, cracked igniter, or broken bake element. Regular maintenance is essential to prevent such issues and ensure optimal performance.
7.1. Bake Element Not Heating
If your Jenn Air oven’s bake element isn’t heating, it can disrupt cooking. Common causes include a defective electronic control board, cracked igniter, or broken bake element. Check for visible damage or wear. Ensure proper electrical connections and inspect the control board’s relays. If the igniter is cracked, it may fail to glow, preventing gas flow; A tripped circuit breaker or blown fuse could also cut power. Troubleshooting steps include resetting the breaker, inspecting fuses, and testing element continuity with a multimeter. If issues persist, professional repair may be necessary to replace faulty components and restore functionality.
7.2. Broil Element Not Working
If the broil element in your Jenn Air oven isn’t functioning, it can hinder cooking performance. Common issues include a defective electronic control board, a cracked igniter, or a broken broil element. Start by inspecting the element for visible damage or wear. Ensure all electrical connections are secure and verify the control board’s relays are operating correctly. A cracked igniter may prevent proper gas ignition, affecting both broil and bake functions. Check for tripped circuit breakers or blown fuses, which could interrupt power. Troubleshooting steps involve resetting the breaker, replacing fuses, and testing element continuity with a multimeter. If problems persist, consider professional repair to replace faulty components and restore functionality.
7.3. Element Replacement Procedures
Replacing faulty elements in your Jenn Air oven is crucial for restoring functionality. Start by disconnecting power to the oven for safety. Access the broil or bake element by removing the oven racks and back panel. Use a screwdriver to disconnect electrical connections and remove mounting screws. Inspect the element for cracks or wear. Replace it with a compatible part, ensuring proper alignment and secure fastening. Reconnect electrical wires carefully to avoid short circuits. After replacing, test the oven to ensure the element heats correctly. If unsure, consult a professional technician for assistance. Always refer to the Jenn Air oven manual for specific guidance.

Electrical and Power Issues
Common electrical issues include tripped circuit breakers and blown fuses. Ensure the oven is properly plugged in and check for power outages. Resetting the circuit may resolve the issue.
8.1. Tripped Circuit Breaker
A tripped circuit breaker is a common issue that can cause your Jenn Air oven to lose power. This often occurs due to overloaded circuits or power surges. To resolve this, locate your home’s circuit breaker panel and check if the breaker associated with the oven has tripped. Reset it by turning it off and then back on. If the issue persists, ensure no other high-power appliances are on the same circuit. A blown fuse in the oven’s electrical system may also require replacement. Always unplug the oven before attempting any repairs to avoid electrical shock. Regularly inspecting your electrical connections can prevent such issues from recurring.
8.2. Blown Fuse
A blown fuse in your Jenn Air oven can disrupt its operation, causing it to stop working entirely. This issue often arises from power surges, overloaded circuits, or internal component failures. To address this, switch off the oven and unplug it for safety. Locate the fuse box or electrical panel controlling the oven’s power. Identify and replace the blown fuse with one of the correct amperage rating. If the fuse blows again after replacement, it may indicate a deeper electrical issue. Consulting a professional technician is recommended to prevent further damage or safety hazards. Regular inspections of the oven’s electrical system can help identify potential fuse issues before they occur.
8.3. Power Outage Recovery
After a power outage, your Jenn Air oven may require resetting to resume normal operation. Start by ensuring the oven is turned off and unplugged for safety. Once power is restored, plug in the oven and check if it functions properly. If the display is unresponsive or error codes appear, reset the oven by turning off the circuit breaker for 30 minutes. This allows the system to clear any temporary glitches. After restoring power, test the oven by setting a low temperature to ensure heating elements activate. If issues persist, consult a professional technician to diagnose and repair any internal damage caused by the outage.
Professional Repair and Service
For complex Jenn Air oven issues, certified technicians offer expert diagnostics and repairs. They handle major and minor problems efficiently, ensuring reliable and long-lasting solutions for your appliance.
9.1. When to Call a Technician
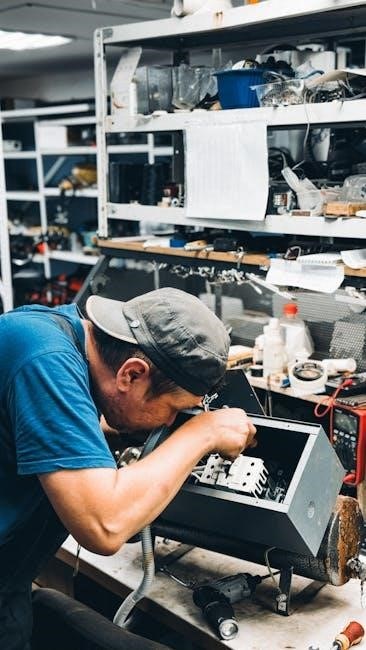
Call a certified Jenn Air technician if you encounter complex issues beyond basic troubleshooting. This includes persistent error codes, faulty electronic components, or when critical parts like the igniter or control board fail. If DIY repairs don’t resolve the problem or you’re unsure about procedures, professional assistance is recommended. A technician can diagnose underlying issues and ensure repairs are done safely and efficiently, preventing further damage. They also provide genuine parts and warranties, guaranteeing reliable solutions for your oven’s optimal performance.
9.2. Finding a Certified Jenn Air Repair Service
To find a certified Jenn Air repair service, start by visiting the official Jenn Air website, which provides a service locator tool to find authorized technicians in your area. Additionally, check online reviews and ask for recommendations from trusted sources. Ensure the service has certifications like EPA for gas oven repairs and is factory-trained. Verify their experience with Jenn Air models and request a detailed cost estimate before proceeding. A reputable service will also provide warranties for their work and use genuine Jenn Air parts, ensuring reliable and long-lasting repairs for your appliance.
9.3. Cost Estimates for Common Repairs
Cost estimates for Jenn Air oven repairs vary based on the issue. Replacing a defective electronic control board typically ranges from $200 to $500, while a cracked igniter may cost $100 to $300. A broken bake element replacement can be between $100 and $250. Additionally, labor costs for a certified technician usually range from $75 to $150 per visit. For complex issues like a malfunctioning self-clean cycle or a faulty touchpad, costs can exceed $400. Always request a detailed estimate from a certified service to ensure transparency and avoid unexpected charges. Using genuine Jenn Air parts often ensures better durability and warranty coverage.
Maintenance Tips to Prevent Issues
Regularly inspect and replace worn-out parts to prevent malfunctions. Ensure proper ventilation for efficient operation. Schedule annual professional maintenance for optimal performance and longevity of your Jenn Air oven.
10.1. Regular Cleaning Schedule
Regular cleaning is essential to maintain your Jenn Air oven’s performance. Clean food spills immediately to prevent grime buildup. Schedule a deep clean every 1-3 months using the self-clean cycle or natural cleaners. Wipe down surfaces after each use to avoid residue accumulation. For tougher stains, mix baking soda and water, apply overnight, and scrub gently. Avoid harsh chemicals that may damage finishes. Clean racks and shelves separately in warm soapy water. Consistent cleaning prevents odors, ensures even heating, and extends the oven’s lifespan. Refer to your user manual for specific cleaning recommendations tailored to your model.
10.2. Checking and Replacing Parts
Regularly inspecting and replacing worn-out parts is crucial for maintaining your Jenn Air oven’s efficiency. Check the bake and broil elements for cracks or damage. Inspect the igniter for proper glowing and ensure the door seals are intact. If any part is faulty, refer to the user manual or manufacturer’s website for compatible replacements. Replace damaged heating elements or faulty igniters promptly to prevent further issues. For complex parts like the electronic control board, consult a certified technician. Always turn off power before attempting any replacements. Proper maintenance ensures optimal performance and extends the lifespan of your oven.
10.3. Proper Usage Guidelines
To ensure optimal performance and safety, follow proper usage guidelines for your Jenn Air oven. Always preheat the oven as instructed and use the correct bakeware for the recipe. Avoid overcrowding the oven, as this can disrupt air circulation and affect cooking results. Clean spills immediately to prevent damage to the interior and maintain proper heating. Never use abrasive cleaners or scrubbers, as they can harm the finish. Regularly check and adjust oven racks to ensure they are secure. Refer to the user manual for specific guidelines on cooking modes, temperature settings, and safety precautions. Proper usage extends the lifespan of your appliance and ensures reliable operation.
User Manual and Resources
Your Jenn Air oven manual provides detailed setup, operation, and troubleshooting instructions. It includes guides for cooking modes, maintenance, and safety. Access online resources for parts diagrams and repair information to ensure optimal performance and address issues effectively. Always refer to official Jenn Air resources for accurate support.
11.1. Locating the Jenn Air Oven Manual
Your Jenn Air oven manual is typically included with your appliance purchase or can be found online. Visit the Jenn Air official website and search for your specific model number to download a digital copy. If you cannot locate it, check the packaging or the oven itself, as manuals are often stored there. Additionally, retailers or authorized dealers may have access to manuals for your model. For further assistance, contact Jenn Air customer support or refer to their online resources. Always ensure you have the correct manual for your oven to avoid confusion and ensure proper troubleshooting.
11.2. Online Troubleshooting Guides
For quick solutions, online troubleshooting guides are available on the Jenn Air website and other appliance repair forums. These guides provide step-by-step instructions for resolving common issues, such as error codes, heating problems, and ignition failures. Many online resources include detailed diagrams and videos to help users diagnose and fix issues independently. Additionally, YouTube tutorials and repair blogs often cover specific Jenn Air oven problems, offering practical advice. Before attempting repairs, always consult the official Jenn Air troubleshooting guide for your model to ensure accuracy. Online forums also offer community support, where users share their experiences and solutions for various oven-related challenges.
11.3. Parts Diagram and Replacement Information
Jenn Air provides detailed parts diagrams to help identify and locate components for replacement. These diagrams, available on their official website or in the user manual, ensure accurate repairs. For common issues like a faulty igniter or damaged door seals, the diagrams guide users to the exact part needing replacement. Replacement information often includes part numbers and installation tips, making DIY repairs more manageable. Always cross-reference parts with the manual to avoid mismatches. For complex repairs, contacting a certified technician is recommended to ensure safety and proper functionality. Using genuine Jenn Air parts guarantees compatibility and longevity of the appliance.