
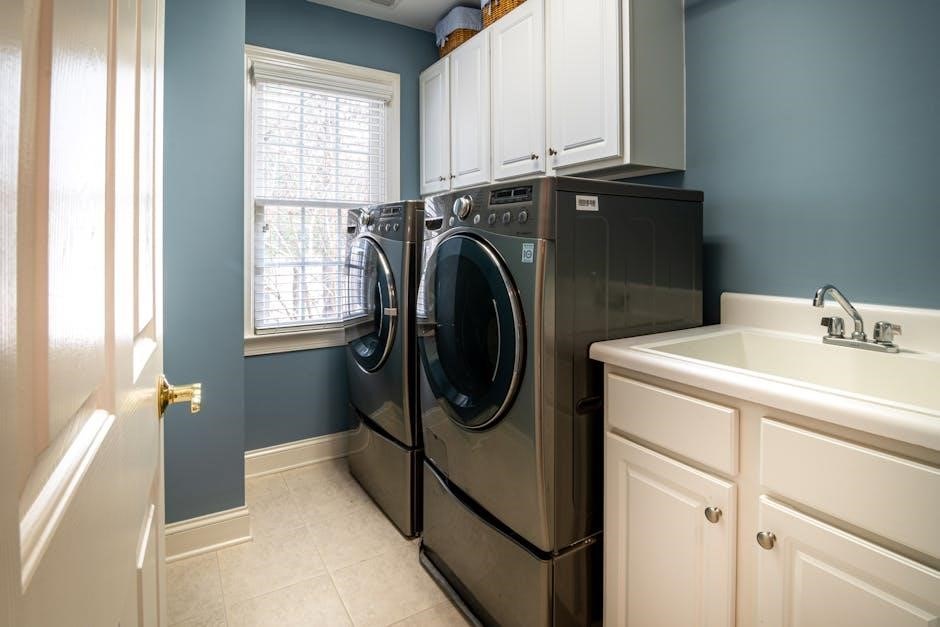
Integrated door fitting for Hoover washing machines ensures seamless kitchen integration, hiding the appliance behind a cabinet door for a sleek, modern look․ Proper alignment and secure attachment of the door are crucial for smooth operation and durability․ This guide provides step-by-step instructions and essential tips for a successful installation․
1․1․ Overview of Integrated Washing Machine Doors
Integrated washing machine doors are designed to seamlessly blend with kitchen cabinetry, concealing the appliance behind a matching door․ This setup provides a sleek, modern aesthetic while maintaining functionality․ Proper installation ensures smooth operation and longevity․ The process involves attaching mounting brackets to the machine, aligning the door, and securing it with hinges․ Correct alignment is crucial for proper door operation․ Homeowners can achieve a professional finish by following manufacturer guidelines, ensuring the door matches the washing machine’s design and integrates effortlessly into the kitchen environment for a clutter-free appearance․
1․2․ Importance of Proper Door Fitting
Proper door fitting is essential for ensuring the washing machine operates efficiently and safely․ A well-fitted door prevents water leakage, reduces noise, and maintains energy efficiency․ Misalignment can lead to poor sealing, affecting performance and longevity․ Secure fitting also prevents accidental door movement, reducing the risk of damage or injury․ Proper installation ensures the door opens and closes smoothly, aligning with the washing machine’s design․ Correct fitting enhances durability, prevents wear on hinges, and maintains the appliance’s appearance․ It is crucial to follow manufacturer guidelines to achieve a precise and secure fit for optimal functionality and safety․

Essential Components for Door Fitting
The key components include mounting brackets, a compatible cabinet door, and sturdy hinges․ These ensure proper alignment, secure attachment, and smooth operation of the integrated washing machine door․
2․1․ Mounting Brackets for the Washing Machine
Metal mounting brackets are essential for securing the integrated door to the washing machine․ These brackets are typically pre-drilled and attached to the machine’s front panel․ Proper alignment ensures the cabinet door fits seamlessly․ Use the provided screws to fasten the brackets firmly․ Ensure the brackets are level to avoid door misalignment․ For Hoover models, genuine or compatible brackets are recommended․ Incorrectly fitted brackets can lead to poor door functionality․ Always refer to the manufacturer’s guidelines for specific bracket placement and screw torque specifications to guarantee stability and longevity of the integrated door system․
2․2․ Cabinet Door and Its Compatibility
The cabinet door must be compatible with the washing machine’s dimensions and mounting brackets․ Ensure the door material, such as MDF or wood, matches your kitchen decor․ The door’s hinges and handle should align with the washing machine’s porthole for smooth operation․ Measure the door’s size accurately to fit the machine seamlessly․ Use a template if provided to mark hinge positions and drill pilot holes․ Proper alignment ensures the door opens and closes without obstruction․ Incorrect sizing or material can lead to functional issues․ Always verify compatibility with Hoover’s specifications for a flawless installation and optimal performance․
2․3․ Hinges and Fittings for Secure Attachment
Hinges and fittings are critical for securely attaching the cabinet door to the washing machine․ Use high-quality hinges designed for integrated appliances to ensure smooth door movement․ soft-close hinges are recommended to prevent slamming and extend the door’s lifespan․ Align the hinges precisely with the mounting brackets to maintain proper door balance․ Ensure all screws and fittings are tightened securely to avoid loose connections․ Incorrectly fitted hinges can lead to door misalignment or damage over time․ Always use genuine or compatible fittings to guarantee a sturdy and durable attachment, ensuring the door operates smoothly for years to come․

Step-by-Step Fitting Process
Attach mounting brackets to the washing machine, align the cabinet door, mark and drill pilot holes, then secure the door for proper functionality and durability․ Ensure the door opens in the same direction as the porthole for space efficiency․
3․1․ Preparing the Washing Machine for Door Installation
Start by ensuring the washing machine is level and stable․ Attach the mounting brackets to the front of the machine, aligning them with the pre-drilled holes․ Double-check that the door opening direction matches the cabinet door’s hinge placement․ Ensure the surrounding area is clear of obstructions․ Plug in the machine and test its basic functions before proceeding․ For safety, make sure the door can be locked or positioned to prevent accidental opening during operation․ Proper preparation ensures a smooth and secure door installation process․
3․2․ Aligning the Cabinet Door with Mounting Brackets
Align the cabinet door with the mounting brackets on the washing machine, ensuring proper fit and even spacing․ Use a spirit level to confirm the door is straight․ Mark the pilot holes for screws, then clamp the door into position to maintain alignment․ Double-check that the hinges are securely attached and the door swings in the correct direction․ Adjust as needed to achieve a flush fit with the surrounding cabinetry․ Proper alignment ensures smooth operation and prevents wear on the door or machine over time․
3․3․ Securing the Door to the Washing Machine
Once aligned, insert the screws through the mounting brackets and into the cabinet door, ensuring they are tightened firmly․ Check that the hinges are securely attached to both the door and the machine․ Use a spirit level to confirm the door is evenly positioned․ Tighten all fittings gradually to avoid misalignment․ Ensure the door closes smoothly and evenly, with no gaps or unevenness․ Double-check that all screws are tightened properly to prevent loosening over time․ Properly securing the door ensures stability and prevents damage to the machine or surrounding cabinetry․
3․4․ Testing the Door for Proper Functionality
After securing the door, test its functionality by opening and closing it several times to ensure smooth operation․ Check that the door aligns perfectly with the washing machine and surrounding cabinetry, with no gaps or unevenness․ Verify that the door closes securely and remains shut when not in use․ Test the door’s weight distribution to ensure it opens and closes evenly․ Additionally, ensure all electrical connections remain accessible and unobstructed․ Proper functionality ensures safe and efficient use of the integrated washing machine, preventing potential damage or safety hazards․

Safety Considerations
Ensure the washing machine plug is accessible and the door is installed behind a lockable or sliding door․ Position hinges correctly to prevent accidental movement and ensure safe access․
4․1․ Ensuring Electrical Safety
When fitting the integrated door, ensure the washing machine is unplugged to avoid electrical hazards․ The plug must remain accessible, not hidden behind the door․ Proper installation prevents water exposure to electrical components․ Follow manufacturer guidelines to secure wires and connections․ Never attempt repairs while the machine is operational․ Always refer to the user manual for specific safety precautions to ensure a safe and reliable installation process․
4․2․ Preventing Accidental Door Movement
To prevent accidental door movement, ensure the integrated door is securely fitted with robust hinges and brackets․ Proper alignment during installation is crucial to avoid misalignment; Use safety latches or soft-close mechanisms to stabilize the door․ Regularly inspect and tighten fittings to maintain stability․ Ensure the door is installed behind a lockable or sliding mechanism if possible․ Test the door’s movement after installation to confirm smooth operation without unintended shifts․ This ensures safety and longevity of the integrated washing machine door system․
DIY Repair and Maintenance Kits
DIY repair kits for Hoover integrated washing machine doors include hinges, brackets, and fixings, ensuring compatibility and ease of installation․ These kits provide genuine parts for secure repairs․
5․1․ Identifying the Correct Door Fitting Kit
To identify the correct door fitting kit for your Hoover integrated washing machine, ensure compatibility by checking the model number and specifications․ Genuine Hoover kits, such as part numbers 92784297 or 43013964, are designed for specific models like HBWM 815TH-S or HBWD 8514DC-80․ These kits include hinges, brackets, and screws tailored for secure installation․ Always refer to the user manual or manufacturer’s website to confirm compatibility․ DIY repair kits are widely available online, ensuring a perfect fit and reliable performance․ Popular retailers like 4ourhouse․co․uk offer authentic Hoover parts for seamless repairs․
5․2․ Tips for DIY Installation
When installing your Hoover integrated washing machine door, ensure precise alignment by measuring twice before drilling․ Align the door to match the porthole’s direction for a consistent look․ Use template guides for accurate hole placement․ Check the door’s weight capacity to avoid overload․ Unplug the machine during installation for safety․ Enlist a second person to help with alignment․ Double-check all screws and hinges for tightness post-installation․ Test the door by opening and closing it several times․ These steps ensure a secure, functional, and aesthetically pleasing installation, avoiding common pitfalls and ensuring longevity․

Common Issues and Troubleshooting
Common issues include door misalignment, loose hinges, and incorrect bracket installation․ Troubleshooting involves adjusting hinges, tightening screws, and verifying proper bracket alignment for smooth operation․
6․1․ Door Misalignment and Adjustment
Door misalignment is a common issue that can affect the functionality of your Hoover integrated washing machine․ If the door is not properly aligned, it may not close securely, leading to noise, vibration, or even damage to the surrounding cabinet․ To address this, check the mounting brackets and hinges for any loose screws․ Tighten them if necessary․ Adjust the hinges by slightly loosening the screws and realigning the door to ensure it sits flush with the surrounding surface․ If misalignment persists, consider consulting the manufacturer’s guidelines or a professional for assistance․ Proper alignment ensures smooth operation and longevity of the door and machine․
6․2․ Dealing with Damaged Hinges
Damaged hinges can cause the door to sag or malfunction, affecting the overall performance of your Hoover integrated washing machine․ If you notice hinge damage, inspect for wear or breakage․ Replace damaged hinges with genuine Hoover parts to ensure compatibility and durability․ Use a DIY repair kit specifically designed for integrated doors, following the manufacturer’s instructions․ Align the new hinges carefully and secure them tightly to prevent further issues․ If unsure, consult a professional to avoid improper installation, which could lead to safety hazards or further damage․
Ensure the door fits perfectly, functions smoothly, and is securely attached․ Verify alignment, proper sealing, and hinge stability for long-term durability and safe operation of your Hoover integrated washing machine․
7․1․ Verifying the Door Fit and Function
After installation, check the door alignment with the washing machine to ensure a seamless fit․ Open and close the door multiple times to confirm smooth operation and proper sealing․ Inspect the hinges for stability and verify that the door does not wobble or misalign․ Ensure all screws and brackets are securely tightened to prevent any movement or gaps․ Proper fit and function are essential for maintaining the appliance’s performance and longevity․ Address any issues immediately to avoid potential damage or safety hazards․
7․2․ Ensuring Long-Term Durability
Regular maintenance is key to ensuring the longevity of your Hoover integrated washing machine door․ Inspect hinges and brackets periodically for wear and tear, lubricating moving parts to prevent rust or stiffness․ Clean the door and surrounding areas to avoid dust buildup, which can affect alignment․ Avoid using harsh chemicals that might damage the finish․ Proper care and timely adjustments will help maintain the door’s functionality and appearance over time, ensuring it remains a durable and integral part of your kitchen design․

Additional Resources
For further guidance, refer to Hoover’s official website, instructional YouTube videos, or appliance forums for detailed door fitting tutorials and troubleshooting tips from experts and users․
8․1․ Manufacturer Guidelines and Support
Hoover provides comprehensive guidelines and support for integrated washing machine door fitting․ Their official website offers detailed manuals, ensuring compatibility with specific models․ Genuine parts, like the replacement hinge kit (part number 92784297), guarantee an exact fit․ Manufacturer instructions emphasize proper alignment and secure attachment to maintain functionality․ Following these guidelines ensures safety, durability, and a seamless integration with your kitchen design․ For additional assistance, Hoover’s customer support is available to address queries and provide tailored solutions, making the installation process straightforward and stress-free․
8․2․ Online Tutorials and Community Forums
Online tutorials and community forums offer valuable resources for Hoover integrated washing machine door fitting․ Websites like YouTube provide video guides, while forums share user experiences and troubleshooting tips․ These platforms often include step-by-step instructions and photos, helping DIY enthusiasts achieve professional results․ Community feedback highlights common pitfalls and solutions, ensuring a smoother installation process․ By leveraging these resources, homeowners and installers can confidently fit integrated doors, achieving a flawless kitchen aesthetic and optimal appliance functionality․