Sod Skinning Guide: A Comprehensive Overview (Updated 02/04/2026)
This guide details the sod skinning process, covering costs, equipment, and techniques for efficient lawn renovation as of today, February 4th, 2026.

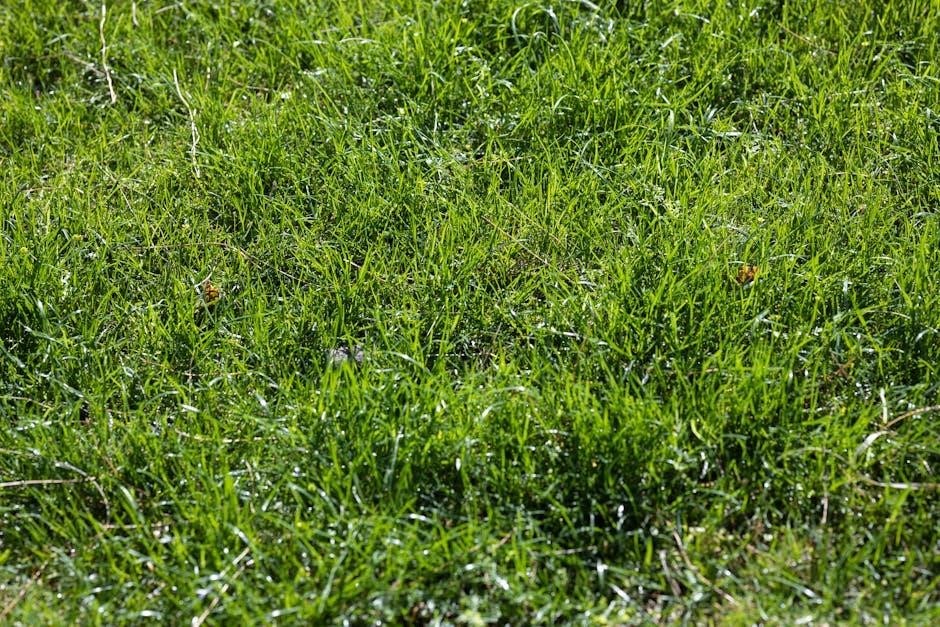
What is Sod Skinning?
Sod skinning is a landscaping technique involving the precise removal of the top layer of turf – the sod – while leaving the underlying soil relatively undisturbed. Unlike complete sod removal, which can disrupt the soil structure, skinning delicately separates the grass and its root system. This method utilizes specialized equipment, like a sod cutter, to slice beneath the grass roots, creating strips for easy lifting and relocation.
It’s ideal for projects needing lawn renovations, preparing for seeding, or efficiently repurposing existing turf for patching other areas. The process minimizes soil disturbance, aiding in quicker recovery and establishing new growth.
Why Choose Sod Skinning?
Opting for sod skinning presents numerous advantages over complete sod removal. It’s a less disruptive process, preserving valuable topsoil and minimizing the need for extensive leveling or soil amendment. This translates to faster lawn establishment and reduced recovery time for the remaining ground.
Furthermore, the removed sod can be immediately repurposed for patching bare spots or even entirely re-laid elsewhere, saving on the cost of new sod. It’s an efficient and environmentally conscious choice for landscape renovations, offering a balance between effectiveness and minimal ground disturbance.
Tools and Equipment Needed
Successfully executing a sod skinning project requires specific tools. A sod cutter is paramount – rental options are widely available from companies like Sunbelt Rentals and local equipment providers. Beyond the cutter, you’ll need safety gear, including work gloves and eye protection.
Essential for handling the removed sod are sturdy tarps or pallets for transport. A wheelbarrow facilitates moving sod and debris. For post-skinning, a rake is crucial for leveling, and potentially a spreader for soil amendments or seed. Consider a sharp knife for precise edge work.
Sod Cutter Rental – Costs and Options
Renting a sod cutter presents various cost structures. Daily rates typically range from $50 to $100, though this fluctuates. Hourly rates, where available, can start around $92 for four hours, escalating to $164 for a full day. Weekly rentals offer savings, averaging around $437, while monthly options reach $1,309.
Minimum charges often apply, around $60. Companies like Sunbelt Rentals offer efficient machines, with rates varying by location and demand. Classen sod cutters are a popular choice; Consider half-day rates around $52.50 or weekend deals at $105;
Preparing for Sod Skinning
Successful sod skinning begins with thorough preparation. First, meticulously assess the lawn area, identifying obstacles like sprinkler heads, trees, and flowerbeds. Clearly mark the areas designated for sod removal, outlining the boundaries with flags or rope. This prevents accidental over-cutting and ensures a clean, defined edge.
Consider the intended use of the area post-skinning – will it be re-seeded, re-sodded, or used for another purpose? Proper planning minimizes rework and maximizes efficiency. Ensure all underground utilities are clearly marked before commencing any digging or cutting.
Assessing the Lawn Area
A detailed assessment is crucial before starting. Walk the entire lawn, noting variations in grade, soil compaction, and existing turf health. Identify any hidden obstacles like shallow irrigation lines, rocks, or buried debris that could damage the sod cutter.
Pay close attention to areas with poor drainage or excessive thatch buildup, as these may require additional preparation. Measure the square footage of the area to be skinned to estimate rental time and disposal needs. Documenting these conditions informs your approach and prevents unexpected issues during the skinning process.
Marking the Area for Removal
Clearly define the boundaries of the area needing sod skinning using bright-colored marking paint or flags. Straight lines are easiest to follow with a sod cutter, so prioritize rectangular or square shapes whenever possible. For curved areas, use flexible garden edging or a hose as a guide, adjusting as needed.
Ensure the marked area accounts for any planned landscaping changes or new features. Double-check your markings before operating the sod cutter to avoid accidentally removing unwanted turf. Accurate marking minimizes wasted effort and ensures a clean, professional result.
The Sod Skinning Process: Step-by-Step
The sod skinning process involves precise execution for optimal results. Begin by carefully adjusting the sod cutter’s depth to sever the sod’s roots without digging too deeply into the soil. Make an initial straight cut along one edge of the marked area. Subsequently, create parallel cuts, maintaining a slight overlap – approximately 2-3 inches – with each pass.
Pay close attention to corners and edges, potentially requiring multiple angled passes for a clean removal. Consistent speed and depth are crucial for uniform sod strips.
Step 1: Adjusting the Sod Cutter Depth
Precisely adjusting the sod cutter’s depth is paramount for successful skinning. The goal is to cut beneath the grass roots, typically around 1-2 inches, without excessively disturbing the underlying soil. Insufficient depth leaves roots intact, hindering removal, while excessive depth wastes time and energy.
Start with a conservative setting and test a small area, observing the cut. Fine-tune the depth based on the soil type and grass species, ensuring a clean separation. Proper adjustment minimizes re-cutting.
Step 2: Making the Initial Cut
Begin by selecting a straight starting point along one edge of the area designated for sod removal. Engage the sod cutter’s blade and slowly advance, maintaining a consistent speed. Avoid abrupt turns, as this can cause uneven cuts and damage the machine.
Focus on establishing a clean, straight line for the first pass, as this will serve as a guide for subsequent cuts. Overlap each pass slightly to ensure complete separation of the sod from the soil below, creating manageable strips.
Step 3: Subsequent Cuts and Overlap
After the initial cut, continue making parallel passes with the sod cutter, consistently overlapping each strip by approximately 2-3 inches. This overlap is crucial for preventing uncut sections of sod and ensuring a clean, thorough skinning process. Maintain a steady pace and avoid forcing the machine, allowing the blade to do the work.
Regularly check the cutting depth to maintain consistency. Slight adjustments may be needed based on soil conditions and sod thickness, ensuring optimal performance and minimizing re-cutting.
Step 4: Handling Corners and Edges
Navigating corners and edges requires a slower, more deliberate approach. Reduce the cutting speed and carefully maneuver the sod cutter, potentially making multiple passes from slightly different angles. For tight corners, it may be necessary to switch to manual sod removal using a shovel or spade to ensure complete skinning.
Pay close attention to avoid damaging surrounding landscaping or structures. Precision and patience are key when working around obstacles, guaranteeing a neat and professional finish to your sod skinning project.
Sod Cutter Rental Rates – A Detailed Breakdown
Sod cutter rental costs fluctuate based on rental duration and location, averaging between $50 and $100 per day. Hourly rates, where available, can start around $92 for four hours, escalating to $164 for a full 24-hour period. Weekly rentals typically range from $437 to $440, offering significant savings for larger projects.
Minimum charges often apply, around $60, while weekend rates may be slightly higher, around $105-$143. Factors like machine type and demand influence final pricing, so comparing quotes is crucial.
Daily Rental Costs
Expect to pay between $70 and $110 for a daily sod cutter rental, though prices can vary. Sunbelt Rentals lists daily rates around $110, while other companies may offer options closer to $70. Some providers have a minimum charge, potentially around $60, effectively setting a floor for short-term rentals.
These costs generally include basic usage, but insurance and delivery fees are often extra. Availability impacts pricing, with peak seasons potentially incurring higher daily rates. Always confirm the total cost before finalizing your rental.
Weekly Rental Costs
For extended projects, weekly sod cutter rentals offer significant savings. Rates typically range from $280 to $440 per week. Sunbelt Rentals advertises weekly rates around $437, while local equipment rental companies may provide options closer to $280. A weekly rental is ideal for larger lawns or those requiring multiple passes.
Consider the project timeline; a weekly rental avoids daily rate accumulation. Check for potential discounts for longer rental periods. Remember to factor in fuel costs and potential damage waivers when budgeting for a weekly rental.
Hourly Rental Costs (Where Available)
Hourly sod cutter rental options are less common, but some local equipment rental companies may offer them. Rates, when available, can vary significantly. Information suggests an hourly rate of N/A, but some sources indicate potential costs around $96 for four hours, effectively $24 per hour.
This option suits very small areas or quick tasks. Carefully calculate the estimated project time to determine if hourly rental is cost-effective. Minimum charges often apply, potentially exceeding the cost of a daily rental for short projects.
Factors Affecting Rental Prices
Several factors influence sod cutter rental costs. Demand plays a significant role, with prices increasing during peak landscaping seasons. Rental duration impacts the overall cost; daily rates are generally lower per hour than shorter rental periods. The specific model of sod cutter also matters, with more powerful or newer machines commanding higher prices.
Location influences pricing, as rates vary between regions and even between rental companies within the same area. Additional fees, like delivery charges or insurance, can add to the total expense.
Removing the Sod Strips
After cutting, efficiently removing the sod strips is crucial. Begin by carefully lifting one end of each strip, utilizing the sod cutter’s lifting mechanism if equipped, or a sturdy shovel. Gently roll the sod strip upon itself, creating a manageable bundle for transport. Avoid abruptly tearing the sod, as this can leave excessive debris behind;
Consider the weight of the sod; larger strips can become quite heavy. Plan your transport route beforehand to minimize carrying distances and potential damage to your landscape.
Lifting and Rolling the Sod
Successfully lifting and rolling the sod strips is key to an efficient removal process. Start by gently inserting a shovel under a corner of the cut sod, carefully prying it loose from the soil below. Once lifted, begin rolling the sod tightly, similar to a carpet, ensuring a compact bundle.
This rolling action not only makes the sod easier to carry but also helps contain the roots and soil, minimizing mess. Be mindful of the sod’s weight as you roll; larger sections require more effort.

Transporting the Sod
Once rolled, efficiently transporting the sod is crucial. Depending on the volume, consider using a wheelbarrow, garden cart, or even a pallet jack for larger quantities. Protect your vehicle if loading directly into a truck or trailer with a tarp or plastic sheeting to contain any loose soil.
Plan your route to minimize carrying distances and avoid obstacles. Remember that sod is heavy, so prioritize safe lifting techniques and avoid overexertion. Prompt transport prevents the sod from drying out and crumbling.
Dealing with the Remaining Soil
After sod removal, the exposed soil requires attention. Begin by leveling the surface, addressing any uneven areas created during the skinning process. Thoroughly remove any remaining roots, rocks, and debris to create a smooth foundation for future landscaping. This step is vital for proper drainage and prevents future issues with seeding or sod installation.
Consider amending the soil with compost or other organic matter to improve its structure and fertility, preparing it for healthy plant growth. A level, clean base is essential.

Leveling the Soil Surface
Achieving a level soil surface post-sod skinning is crucial for successful lawn establishment. Use a landscape rake to distribute soil evenly, filling in low spots and removing high areas. A consistent grade ensures proper water runoff, preventing puddling and promoting uniform growth. Compacting the soil lightly with a roller after leveling further stabilizes the surface.
Pay close attention to areas where the sod cutter may have left ridges or depressions, ensuring a smooth, even plane for seeding or new sod installation. This foundational step impacts the lawn’s overall health.
Removing Roots and Debris
After leveling, thoroughly remove any remaining roots, rocks, and debris from the exposed soil. These obstructions can hinder root development and create uneven surfaces. A garden fork is effective for loosening and lifting stubborn roots, while hand-picking larger stones is recommended. Screening the soil can also help eliminate smaller debris.
Complete removal ensures a clean slate for new growth, promoting healthy turf establishment. Don’t underestimate this step; a debris-free soil profile is vital for optimal lawn health and long-term success.
What to Do with the Removed Sod?
Once removed, don’t simply discard the sod! Several options exist for repurposing this valuable resource. Consider using sections of healthy sod for patching bare spots in other areas of your lawn, providing instant coverage. Alternatively, composting the sod adds nutrient-rich organic matter to your garden.
If neither of those options suit, ensure proper disposal according to local regulations. Avoid illegal dumping; many municipalities offer yard waste collection services or designated drop-off locations.
Re-purposing Sod for Patching
Immediately after skinning, assess the removed sod for healthy, viable sections. These pieces are perfect for patching bare or damaged areas within your existing lawn, or even in other parts of your property. Carefully cut the salvaged sod into appropriately sized pieces to fit the repair locations.
Ensure good contact between the new sod and the underlying soil, and water thoroughly. This method offers instant gratification, providing immediate green coverage and minimizing erosion, a cost-effective solution!
Composting the Sod
Removed sod makes an excellent addition to a compost pile, enriching your garden soil over time. Chop or shred the sod into smaller pieces to accelerate decomposition. Layer it with brown materials like leaves and twigs, ensuring a balanced carbon-to-nitrogen ratio.
Regularly turn the compost pile to aerate it and maintain optimal moisture levels. This process can take several months, yielding a nutrient-rich compost ideal for amending flowerbeds and vegetable gardens, a sustainable practice!
Disposing of Sod Properly
If composting or repurposing isn’t feasible, proper sod disposal is crucial. Check with your local waste management services for guidelines, as some areas prohibit yard waste in regular trash bins. Many municipalities offer yard waste collection programs or designated drop-off locations.
Avoid illegally dumping sod, which can result in fines. Consider the environmental impact and opt for responsible disposal methods. Large quantities may require a dedicated waste removal service for efficient and compliant handling.
Common Mistakes to Avoid
A frequent error is setting the incorrect cutting depth on the sod cutter; too shallow and you won’t remove the roots, too deep and you’ll damage the underlying soil. Rushing the process is another common pitfall, leading to uneven cuts and increased effort.
Failing to plan the cutting pattern adequately can also cause issues. Remember to overlap passes slightly for a clean removal. Neglecting safety precautions, like wearing proper gear, is a serious mistake. Avoid these errors for a smoother, more successful sod skinning experience.
Setting the Incorrect Cutting Depth
Adjusting the sod cutter’s depth is crucial for successful skinning. A depth that’s too shallow won’t sever the root system effectively, leaving behind regrowth and requiring repeat cuts. Conversely, setting the depth too deep can excavate excessive soil, creating a larger leveling task and potentially damaging underground utilities.
Always start with a recommended depth – typically around 1-2 inches – and test a small area. Observe the removed sod to ensure complete root separation. Fine-tune the depth based on your lawn’s specific conditions and soil type.
Rushing the Process
Sod skinning demands patience and a methodical approach. Attempting to accelerate the process by increasing the machine’s speed or skipping overlapping passes often results in an uneven cut and incomplete sod removal. This necessitates multiple re-cuts, ultimately consuming more time and energy than a slower, more deliberate pace.
Take your time, maintain a consistent speed, and ensure adequate overlap between each pass. Prioritize quality over speed to achieve a clean, efficient skinning job and minimize post-work cleanup.
Safety Precautions
Operating a sod cutter requires strict adherence to safety guidelines. Always wear appropriate personal protective equipment (PPE), including sturdy work boots, safety glasses, long pants, and hearing protection. Be mindful of bystanders and keep them a safe distance from the operating machine.
Before starting, thoroughly inspect the work area for obstacles like rocks, roots, or underground utilities. Never operate the sod cutter on steep slopes or uneven terrain. Always disengage the blades and shut off the engine before making adjustments or clearing obstructions.

Wearing Appropriate Safety Gear
Prioritizing personal safety is crucial when sod skinning. Sturdy, closed-toe work boots are essential to protect your feet from debris and potential injuries. Safety glasses or goggles shield your eyes from flying particles of soil, grass, and rocks ejected during operation.
Long pants provide leg protection, and hearing protection, such as earplugs or earmuffs, minimizes noise exposure. Gloves offer a better grip and protect your hands. Consider a dust mask, especially in dry conditions, to avoid inhaling dust and allergens.
Operating the Sod Cutter Safely
Before starting, thoroughly inspect the sod cutter for any damage or loose parts. Ensure the area is clear of obstacles like rocks, toys, and underground utilities. Start the machine on a flat surface and maintain a firm grip on the handles.
Walk at a consistent pace, avoiding sudden turns or stops; Never operate the cutter while under the influence of drugs or alcohol. Be mindful of bystanders and keep a safe distance. Turn off the machine and disconnect the spark plug before making any adjustments or repairs.
Sod Skinning vs. Sod Removal – Key Differences
Sod skinning precisely separates the grass roots from the underlying soil, leaving a relatively smooth surface ideal for immediate reseeding or new sod installation. Conversely, sod removal completely excavates the turf and a significant portion of the soil beneath.
Skinning is less disruptive to the landscape, minimizing soil disturbance and reducing the need for extensive leveling. Removal is more aggressive, suitable for major renovations or when dealing with heavily compacted or contaminated soil. Skinning utilizes specialized cutters, while removal often involves shovels and manual labor.
Post-Skinning Lawn Preparation
Following sod skinning, proper lawn preparation is crucial for successful regrowth. Begin by thoroughly removing any remaining debris or root fragments from the exposed soil surface. Soil amendment is vital; incorporate compost or other organic matter to improve soil structure and fertility.
Fertilization with a starter fertilizer provides essential nutrients for new seed germination or sod establishment. Leveling any minor imperfections ensures uniform growth. Consider soil testing to determine specific nutrient deficiencies and adjust fertilization accordingly, promoting a healthy and vibrant lawn.
Soil Amendment and Fertilization
After skinning, enriching the soil is paramount. Incorporate organic matter like compost to enhance structure, drainage, and nutrient retention. This creates an ideal seedbed or root zone for new growth. A balanced starter fertilizer, high in phosphorus, is essential for root development.
Consider a soil test to pinpoint specific deficiencies and tailor fertilization. Avoid over-fertilizing, which can harm new seedlings or sod. Proper amendment and fertilization establish a strong foundation for a lush, resilient lawn, ensuring long-term health and vigor.
Seeding or Laying New Sod
Following soil preparation, choose between seeding or sodding. Seeding is cost-effective but requires patience, consistent moisture, and protection from erosion. Select a grass type suited to your climate and sun exposure. Sod provides instant gratification, establishing a lawn quickly, but is more expensive.
When laying sod, ensure tight seams and thorough watering. Regardless of your choice, consistent moisture is crucial for establishment. Proper installation and care will result in a beautiful, thriving lawn, rewarding your efforts with a vibrant outdoor space.
Finding Sod Cutter Rentals Near You
Locating a sod cutter rental is straightforward. Sunbelt Rentals is a prominent option, offering efficient machines and online rate viewing based on your location. Don’t limit yourself; explore local equipment rental companies for potentially competitive pricing and personalized service.
Always compare rental rates – daily, weekly, and hourly (if available) – and factor in delivery fees. Confirm machine availability and reserve in advance, especially during peak seasons. A quick online search will reveal numerous rental options in your area, simplifying the process.
Sunbelt Rentals
Sunbelt Rentals provides a convenient avenue for acquiring a sod cutter, emphasizing efficiency and user-friendliness in their equipment offerings. Their online platform allows you to input your rental details to instantly view equipment rates and confirm availability specific to your geographical area.

Expect a range of Classen sod cutters designed for precise cuts, ideal for landscape renovations. Sunbelt’s commitment to well-maintained machinery ensures a smooth and productive sod skinning experience. Explore their website or contact a local branch for detailed specifications and booking information.
Local Equipment Rental Companies
Beyond national chains, numerous local equipment rental companies offer sod cutters, often providing personalized service and competitive pricing. These businesses frequently cater to homeowners and landscaping professionals alike, stocking a variety of models to suit different project scales.
Don’t hesitate to call around and compare rental rates, minimum charges, and daily/weekly costs. Local companies may offer more flexible rental terms or delivery options. A quick search online or within your community will reveal several viable options for securing the necessary equipment for your sod skinning endeavor.
Maintaining Your Lawn After Sod Skinning
Post-skinning lawn care is crucial for establishing a healthy, vibrant turf. Following seeding or sod laying, consistent moisture is paramount – frequent, light watering is preferable to infrequent deep soaking. Soil amendment with compost or fertilizer provides essential nutrients for robust growth, ensuring strong root development.
Avoid heavy foot traffic on the newly seeded or sodded area until firmly established. Regular monitoring for weeds and pests is also vital, addressing issues promptly to prevent widespread problems. Proper maintenance will yield a lush, resilient lawn for years to come.